
Prototyping is one of the fastest, cheapest, and most effective ways to test your ideas. Before you write a single line of code, you can already test your game idea.
Paper prototypes are one of the fastest, cheapest, and most effective ways to explore whether your concept has potential. Instead of getting lost in assets, code, and polish, you can focus on what really matters:
-
Does the mechanic feel fun?
-
Do players understand what to do?
-
Is it worth developing further?
The goal of every prototype is simple: find value quickly. Identify what’s worth keeping, and discard weak ideas before you’ve sunk weeks into them.
In this article, I’ll show you how I built a simple paper prototype based on an existing game. Then, I’ll explain how you can apply the same method to your own projects.
Why Use an Existing Game as a Starting Point?
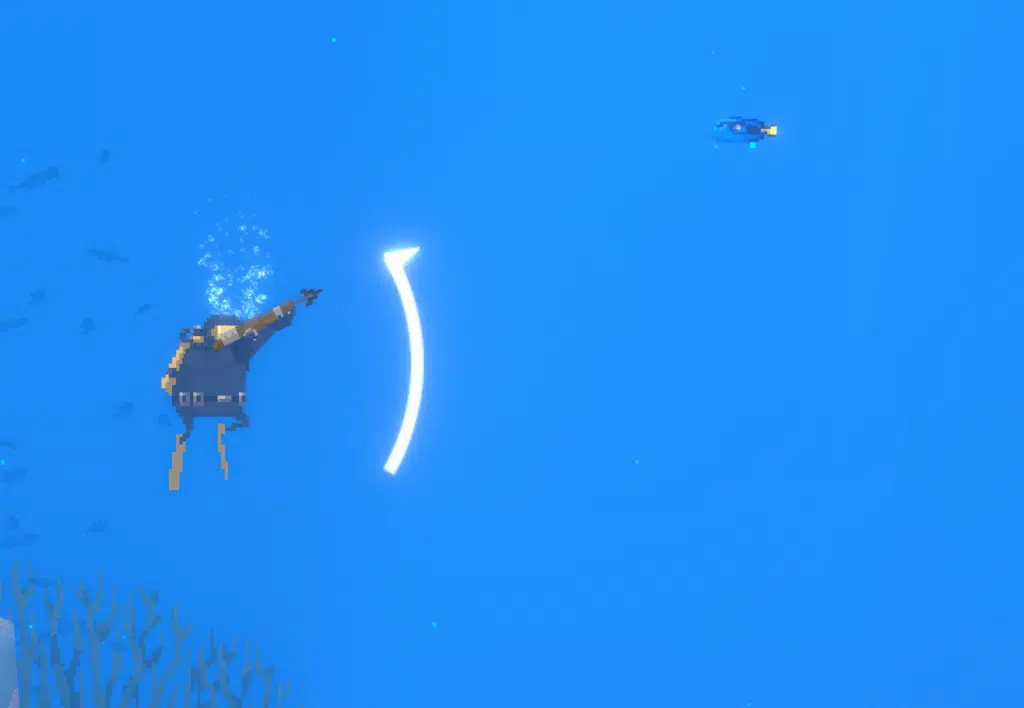
For this demonstration, I used a screenshot from Dave the Diver as my reference. (Credit to MintRocket for creating such an amazing game that I enjoy a lot.)
The reason I started with an existing game is simple:
-
You can see how it works yourself by playing or watching it.
-
It’s easier to translate gameplay into paper form when you have a clear example.
But remember, when you create your own paper prototype, you’ll be translating what’s in your head into a physical space. This example just makes the process easier to visualize.
Step-by-Step Breakdown: From Screen to Paper Prototype
Stage 1 – From Screen to Paper Space
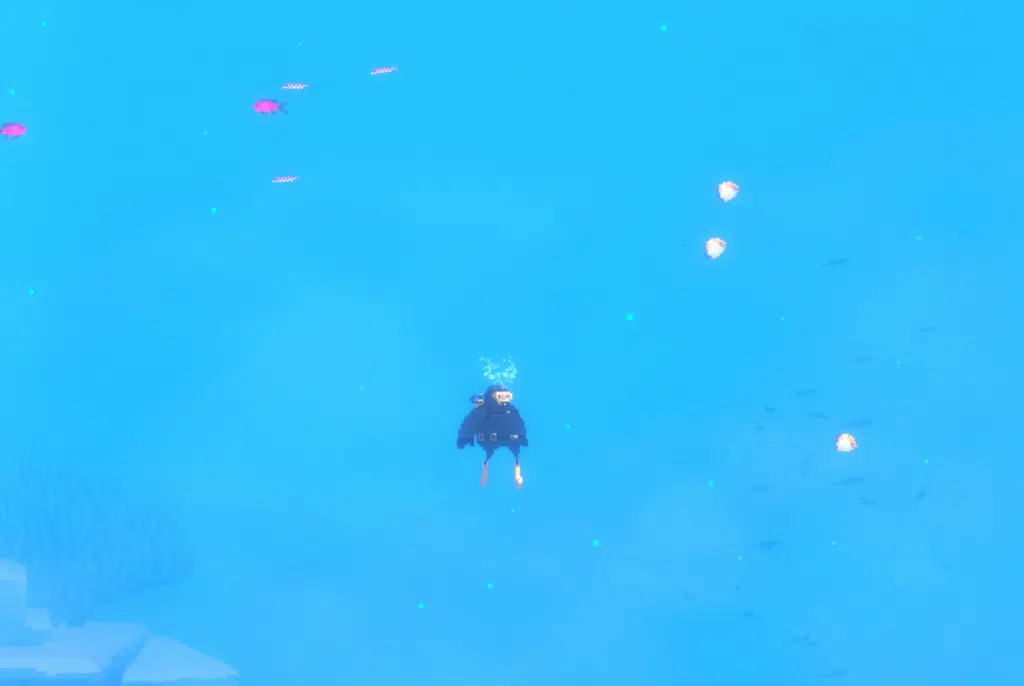
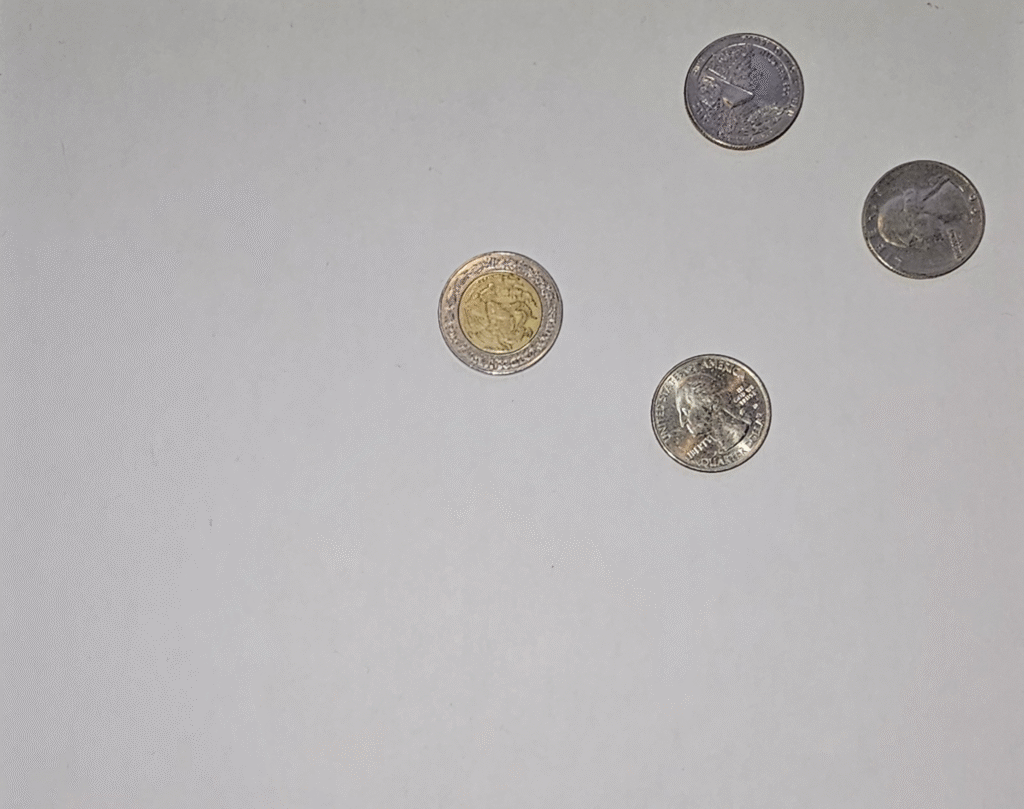
I began with a game screenshot. On paper, I stripped away the visuals and focused on the essentials:
-
Peso coin = the diver
-
Quarters = fish
-
Blank sheet = the sea
This turns a complex digital scene into a simple paper space where interactions can be tested.
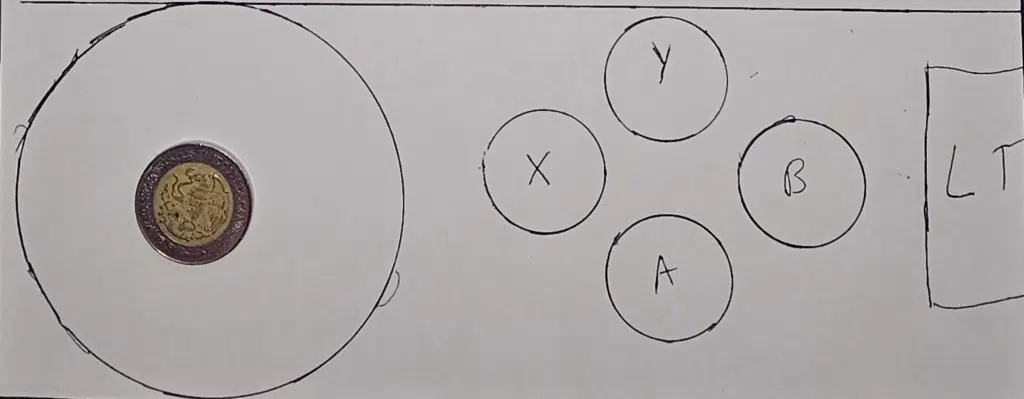
Stage 2 – Building the Controller in Paper
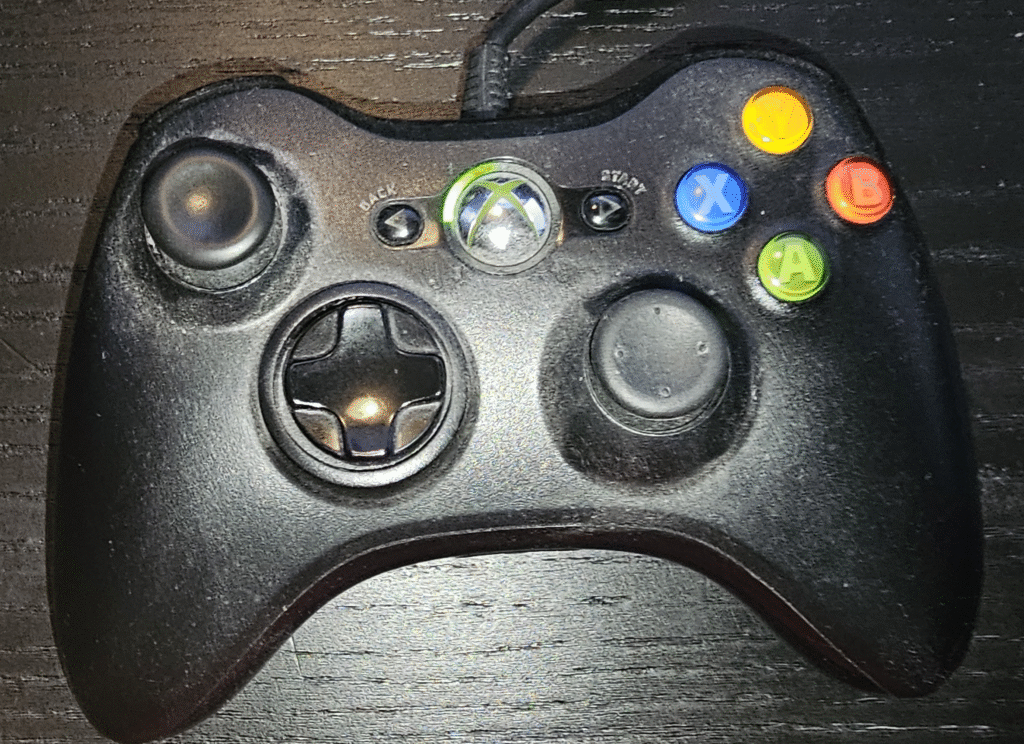
Instead of imagining button presses, I sketched out the controller:
-
A circle with a coin on top = left stick
-
Circles with labels = A and B buttons
-
Small box = LT trigger
Then I mapped the actions:
-
A → switch to combat mode
-
B → close-range knife attack
-
LT → trigger the hook
Having the controller on paper prevents the problem of constantly moving your head up and down between the “screen” and a physical controller. Instead, everything happens in the same space.
Stage 3 – Putting It All Together
Finally, combine the two sheets:
-
Paper “screen” with diver (peso) and fish (quarters).
-
Paper “controller” placed directly below.
![]()
![]()
Now the prototype works as a closed loop:
-
Press input (on the paper controller).
-
With one hand, move the diver coin to simulate the player’s movement.
-
At the same time, use your other hand to move the fish coins freely, representing how the environment or enemies behave.
-
See the result instantly, diver and fish interact, combat is triggered, or exploration continues.
👉 By controlling both sides, the player and the environment, you create a dynamic play session that feels interactive, even though it’s just coins on paper. This helps you explore not only what the player can do, but also how the game world responds.
Free Resource: The Game Dev Starter Kit
Ready to take this further? I put together a Game Dev Starter Kit that makes it easier to:
-
Brainstorm new mechanics and ideas
-
Playtest quickly with a structured guide
-
Define lightweight player personas to keep your design focused
👉 Download the Game Dev Starter Kit here, free and ready to use.
Challenge: Try It Yourself
So far, we walked through exploration and setup. Now let’s add a combat interaction.
In the combat screenshot, the diver switches into attack mode and can strike nearby fish with a knife. Here’s how the inputs work:
-
A → enter combat mode
-
LT → trigger the hook
👉 Your challenge: take this idea and build it into your own paper prototype.
-
Place your diver coin near some fish coins.
-
Press A to go into combat mode.
-
If you’re feeling bold, test out how the hook (LT) could change the interaction.
Don’t worry about “getting it right.” The point of this exercise is to practice translating gameplay mechanics into physical tokens and actions. The more you try, the easier it will be to do the same for your own game ideas.
![]()
Adapting It for Your Own Game
When you move on to building prototypes for your own games, it’s important to avoid some common traps.
This example works because it shows a clear translation from screen to paper. But the same principle applies to your own game ideas:
-
Take the concept in your head.
-
Reduce it to its core loop (movement, interaction, outcome).
-
Represent those loops with physical tokens, coins, dice, cards, or anything you have available.
If you can simulate a known game with a paper prototype, you can absolutely build one for your own project. The key is to keep it fast, cheap, and focused.
Conclusion
Paper prototypes aren’t about accuracy or polish, they’re about speed and clarity. You’re testing mechanics, not graphics. This simple process helps you fail fast, discard weak ideas, and identify what’s truly fun before committing serious development time.
I hope this practical example shows how powerful paper prototypes can be. Try building your own version today, even if it’s just with coins, paper, and imagination.
If this sparked your interest and you want help bringing paper prototyping back into your workflow, explore my Game Prototyping Service. I can guide you through early prototypes, playtesting, and iteration so you can shape your ideas into something truly fun.
FAQ: Paper Prototyping in Game Development
What is a paper prototype in game development?
A paper prototype is a low-cost, physical version of your game idea. Instead of coding, you use paper, coins, dice, or other simple objects to simulate gameplay. It helps you test mechanics and interactions quickly before investing development time.
Why should I make a paper prototype instead of going straight to digital?
Because paper prototypes are fast, cheap, and disposable. They let you identify whether a mechanic is fun or valuable in hours instead of weeks. If it doesn’t work on paper, it won’t work in code.
What materials do I need for a paper prototype?
All you need is paper, a pen, and some tokens (coins, dice, or board game pieces). You can expand with index cards, sticky notes, or whatever helps represent your mechanics.
Can paper prototypes work for digital games?
Yes! Even if your end goal is a digital game, paper prototypes help you explore the core loop — movement, interactions, choices, and feedback — without the overhead of coding. Once validated, you can translate the design into a digital engine.
How do I know if my paper prototype is successful?
A successful paper prototype answers key questions:
-
Is the mechanic fun or interesting?
-
Do players understand what to do?
-
Does the loop feel worth developing further?
If the answer is “yes” to at least one, you’re on the right track. If not, you’ve saved yourself wasted dev time.